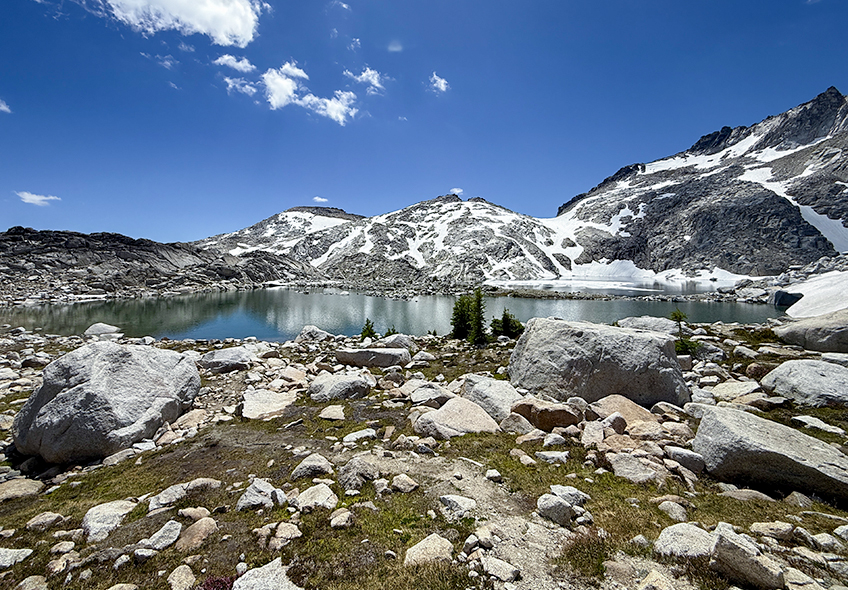
Through-hiking the Enchantments in Washington’s Alpine Lakes Wilderness is a bucket-list adventure for any backpacker. Stretching roughly 20 miles with massive elevation shifts and unforgiving terrain, this point-to-point trek requires precise planning, strategic packing, and solid logistics.
This guide breaks down my 4-day, 3-night itinerary starting from the Stuart Lake trailhead, conquering Aasgard Pass, and exiting via the Snow Lakes trailhead.
Enchantments Permits: What You Need to Know
The Enchantments is one of Washington’s most popular backpacking destinations, so overnight camping is strictly regulated to protect the area. A permit is required for all camping from May 15 through October 31.
Permit Lottery
Permits are awarded through an annual lottery on Recreation.gov. Applications are accepted from February 15 to March 1, with winners notified in March.
- Lottery fee: $6 per application (non-refundable)
- Permit fee: $5 per person, per day if awarded a permit

Permit Zones
The Enchantments are divided into five permit zones, and you’ll need to select one when applying.
The Core Zone, which includes the iconic Enchantment Basin, is the most competitive. The Snow Lakes and Colchuck Lake zones offer a great alternative, allowing campers to day-hike into the basin. The Stuart and Eightmile/Caroline zones are less competitive and offer beautiful scenery with much better permit odds, but no direct access to the Enchantments Core Zone.
For this itinerary, you’ll need a Core Zone permit.
How Competitive Is It?
Demand is extremely high. In 2019, more than 24,000 applications competed for just over 2,000 permits, and Core Zone permits had only about a 2% success rate.
July and August are the most competitive months, and Fridays are the most popular entry day.
Tips for Better Odds
- Consider dates outside July and August.
- Choose a Sunday–Wednesday start date instead of a weekend if your schedule allows.
- And if you don’t secure a permit, check the website daily as they do pop up from time to time.
A little flexibility can significantly improve your chances of securing a permit.

The Pre-Hike Logistics
To successfully through-hike without two vehicles, you need to utilize a local trail shuttle. Before you head out, be sure to print your parking permit and reserve your shuttle ride.
- Night Before Strategy: To get a head start, drive out the afternoon prior. Pull off into one of the many legal dispersed camping/car-camping pull-outs along Icicle Creek Road outside of Leavenworth to sleep in your vehicle, ensuring you wake up fresh and minutes away from the trailhead.
- The Route: From Leavenworth, WA, head up Icicle Road for about 5 miles. That’s it!
- The Drop-off: You can only park in the Snow Lakes Trailhead parking lot for the days of your permit, thus you will have to arrive quite early to beat the day hikers.
- The Shuttle: Catch a pre-booked shuttle from the Snow Lakes Trailhead to the Stuart Lake Trailhead (your starting point). I used the Loop Connector Shuttle and it was super easy.
Day-by-Day Trail Itinerary
Day 1: Stuart Lake Trailhead to Colchuck Lake
- Distance: ~4.5 miles
- Elevation Gain: +2,200 feet
- Difficulty: Moderate

Your journey begins at the Stuart Lake Trailhead. The trail climbs steadily through a dense, beautiful forest and follows alongside a rushing creek. Keep left at the trail junction for Stuart Lake to head toward Colchuck. The final mile gets steeper and more rugged, but it rewards you with your first view of the striking turquoise water of Colchuck Lake sitting beneath the towering Dragontail and Colchuck Peaks.
Definitely stop here for lunch and enjoy this amazing place. I rested for a while, took a swim, recharged my devices with my solar panel, and just enjoyed the magical atmosphere as mountain goats joined me for lunch.
If you started your day really early, you can make your way around the lake and head up Aasgard Pass. But if it’s later in the afternoon, you will be fully exposed to the sun, and when I was there it was quite warm. So I found a campsite right on the lake at the bottom of the rock field and enjoyed the evening.
Day 2: Colchuck Lake to Leprechaun Lake (via Aasgard Pass)
- Distance: ~3 miles
- Elevation Gain: +1,900 feet (followed by a gradual descent)
- Difficulty: Strenuous / Expert

Today you will conquer Aasgard Pass. Start at first light so you are in the shade and be sure to follow the cairns. Take your time as the footing can be quite loose. You will climb 1,900 vertical feet in less than a mile. The surrounding peaks seem to stretch out over you and makes this climb seem even longer than it already is.
- Crucial Tip: Stay to the left of the main larch grove to avoid rockfall hazards and any snow bridges that might collapse. Admire the falls from a distance, lots of people have gotten hurt on the right side and have even died.
Once at the top, you enter the surreal, moon-like alpine wonderland of the Core Enchantments. The best way I can describe it is if Disney created a mountain wonderland.
If you came up the pass on Day 1, this is where you’d be camping.
The first two lakes you will come across are Tranquil and Isolation Lakes. If you made the attempt to climb up the pass on Day 1, this is where you would be camping. It is quite exposed and there are not a lot of sites, take this into account as you progress on Day 1. But if it’s your second day, it’s a great place to stop and have a bite to eat and refill your water supply you most likely used up on the climb.

The hike down to Inspiration Lake is a bit tougher. In mid-July there was still a couple snow fields to cross, a glissade, and a steep rock descent that you may want to take your pack off for and lower it down first. But it’s all very much worth it as Inspiration Lake is fantastic. I stopped for a long swim and lunch here as it was just so beautiful.
Afterwards, you’ll hike through the meadows around Perfection Lake where at this point in the day you’ll be thinking about finding that perfect campsite. There are a few campsites tucked around this lake, but I found the bugs to be the worst here, and it was the middle of the day. Definitely go a little bit further to Leprechaun Lake though, as you’ll be surrounded by jagged peaks, larches, and plenty of sites spaced around the lake. I lucked out and got possibly the best camping spot in all of The Enchantments.
Day 3: Leprechaun Lake to Snow Lakes (via Lake Vivienne)
- Distance: ~4 miles
- Elevation Change: +500 feet gain / -1,800 feet loss
- Difficulty: Moderate to Strenuous (steep descent)

Take your time this morning, you’ve earned it, and it’s absolutely beautiful here. I spent the morning drinking coffee and exploring, slowly making my way through the lower core zone toward Lake Vivienne. Stop and go for a refreshing swim. The crystal-clear water is highly inviting for a brisk, refreshing alpine dip to soothe your sore muscles, and this is your last chance in the core.
From Lake Vivienne, the trail begins its notoriously steep and punishing descent out of the granite core down to the timberline. Take your time navigating the steep slabs and root-filled switchbacks. If the weather is nice, these descents aren’t that bad. But if there is still some snow, or water on the rock, go cautiously as it could be slick and a spill here would not be good.
Important Note: Stay on trail here as a lot of people have cut the switchbacks and created their own paths down and I noticed a lot of trail erosion.
When you reach Upper Snow Lake, you have a mile or so circling around it with many campsites. You should have no problem finding a lakeside campsite to spend your final night in the wilderness.
Day 4: Snow Lakes to Snow Lakes Trailhead
- Distance: ~7 miles
- Elevation Loss: -2,100 feet
- Difficulty: Moderate (taxing on the knees)

The final leg is a long, tiring, continuous descent back to civilization. You’ll pass Lower Snow Lake and Nada Lake before navigating a relentless series of switchbacks through an open avalanche chute and back into the canyon. This will seem to go on forever. For the day hikers, you’ll hear them complain how they can see the parking lot multiple times, but still have miles left.
As the canopy thins, you will hear the rushing waters of the Icicle River, signaling your arrival back at the Snow Lakes Trailhead where one last refreshing dip is waiting for you so you can feel a little refreshed before heading home.
If you’re heading back west on Highway 2, it’s tradition to stop at the 59er Diner and grab a world famous milkshake.
You don’t need a lot of expensive gear to complete this hike. I did it with a budget setup that you can find here: https://naterisch.com/2026/02/20/my-budget-backpacking-gear-picks-for-2026/
Be sure to subscribe to my blog to get notifications of new posts. I’ll have more info on this adventure and a full video series on YouTube soon.

Leave a Reply