
The days are getting longer, the snow is starting to melt (or at least we can pretend it is), and that itch to hit the trail is getting stronger by the day. Backpacking season is just around the corner!
If you’ve been browsing gear shops lately, you might have noticed that prices for outdoor equipment have skyrocketed over the last couple years. But here’s the secret: You don’t need to spend a fortune to have a safe, comfortable, and incredible time in the backcountry.
I’ve put together a list of my top gear picks that balance performance, durability, and cost. These aren’t just “cheap” items; they are high-value workhorses that will last you for miles.
The trick is to start shopping early, wait for sales or returned items, plus search Facebook Marketplace and OfferUp as a lot of people try backpacking once and then sell their gear as it’s not for them.
1. My Pack:
The North Face
Terra 65 Backpack
Why it’s a winner: This pack is legendary for a reason – if you’re going to splurge a little on anything, a quality pack is worth it. This one hits the sweet spot between a beginner pack and a pro-level hauler. I’ve had two of these over the last 25 years now as The North Face warranty is incredible and they replaced my first one free-of-charge after 20 years of use!
- Comfort: It features the OPTIFIT™ suspension system, which is surprisingly adjustable for a pack in this price range. It manages heavy loads well without digging into your hips.
- Accessibility: The massive J-zip allows you to open the main compartment wide, meaning you don’t have to dump out all your gear just to find that one pair of socks at the bottom.
- The Verdict: It’s a bit heavier than ultralight packs, but it’s bombproof and comfortable. I have checked it on airplanes with no worries and have never had an issue with comfort.

You can have short product description here. It can be added as and enable/disable toggle option from which user can have control on it.
Accessories
Most packs, including the one above, come with water bottle pockets on the side and hip pockets on the waistband. But I find that I like to have a water bottle with an electrolyte drink mix and then have a hydration bladder with fresh water.
Speaking of hip pockets, those tend to get filled with snacks, trash, lip balm, and some other essentials I need throughout the hike. Not an ideal place to keep your phone. So I added a shoulder strap pouch to easily access my phone. Plus, I’ve found it keeps better satellite reception as well!

Mazama Trail Flow Reservoir: Made using taste-free, USA-sourced, PVC/BPA-free film.

HikeMan Backpack Shoulder Strap Pouch: Perfect for larger phones and securely mounts to your shoulder strap.
2. Shelter
When I first started putting my gear setup together, I did a lot of research, and then bought two tents to test out. I set them up in my living room, added all of my gear, and simulated being out in the mountains for a night.
Since I’m tall, did I actually fit? What about all of my gear? How easy was it to set up? Could I do it easily in a storm? How small did it pack up? How did it fit into my backpack? So many questions to answer so I didn’t have an issue.

North Face Stormbreak
Why it’s a winner: It’s a classic, no-frills backpacking tent with a simple, reliable design. Its standout feature is the generous length making it a solid choice for taller campers, though the narrow width limits interior storage this is partly offset by a decent-sized vestibule. The iconic yellow color looks great and is easy to spot in the woods, but the lack of a mesh top means you can’t easily stargaze with the rain fly off – which was the only drawback for me!
Kelty Late Start Tent
Why it’s a winner: The Kelty Late Start stands out as an excellent value for casual backpackers, living up to Kelty’s reputation for great bang for your buck. Designed for quick setups, its Quick Corner sleeves make pitching the tent fast and nearly foolproof. Pre-bent poles create vertical walls that offer noticeably more interior space than most tents, with ample length for taller users and enough width to comfortably fit gear inside. While it’s a bit heavier at just under four pounds, it does feature a full mesh canopy which allows for stargazing.


I bought both of mine on Amazon when they were on sale: The North Face Stormbreak for just under $100 and the Kelty Late Start for $80.
Accessories
- REDCAMP Ultralight Tent Footprint: I like to use a footprint for my tent. Protects the bottom of it, stops moisture from soaking in, and can be used for other purposes like sun shelter. You don’t have to pay $40+ for the one made specifically for these tents. I picked up this one on sale for like $12.
3. Sleep System
Your sleeping system is very dependent on your environment that you’ll be backpacking. For me, that was high alpine from spring through fall, with temps ranging from around freezing up to low 60s at night and the possibility of rain since I am in the Pacific Northwest. This also means I’m sleeping on some rocky terrain. Thus, I went for a warmer sleeping bag made of synthetic material for quicker drying, and a thicker, inflatable sleeping pad.
Please do your research as everyone’s sleeping requirements are different. When I was doing mine, I saw “budget” sleeping bags ranging up to $250 and pads over $100. To me, that’s not budget and this is what I ended up testing out:
The North Face Stormbreak 35F
- The HEATSEEKER PRO™ synthetic insulation offers a strong balance of warmth, low weight, good packability, and the ability to regain loft after being compressed.
- A full-length, two-way center zipper is easy to use, vents from the bottom on warmer nights, and is designed to be comfortable for side sleepers.
- As someone who has restless legs this features stretch in the lower-leg area to help improve comfort and freedom of movement. Add in the ability to open the zipper at the bottom and you have a winner in my book!
Kelty Cosmic Synthetic 20F & 40F
- While down is lighter, the synthetic “CirroLoft” fill in this bag mimics the loft of down but—crucially—keeps you warm even if it gets damp.
- Great design and materials that make it feel like a much more expensive bag.
- Comes in two different temperature ratings.


As for the rest of the sleeping system, I couldn’t get myself to buy the “budget” pads that other backpackers were suggesting since there are SO MANY lower priced options. I picked up the one listed below for $20 and it has been great. It inflates quickly with the foot pump, is fairly comfortable, and the included pillow is a good start. I’ve used it on multiple trips now with no fail and have slept well.

Hiipeak Sleeping Pad
It’s cheap, comfortable, and hasn’t failed on me yet. Can be found on sale around $25.
I did notice in my first few uses though, that it would be nice to have more of a pillow. I tried using my jacket in a stuff sack, but it wasn’t ideal. So I picked up one of the Trekology Aluft infaltable ones, and it has been perfect. Packs up really small, has bumpers on the side so you don’t roll off, and can be tucked into the hood of your mummy sleeping bag. They make a larger version too and it’s just as nice. Well worth the price of under $15 that I picked it up for.
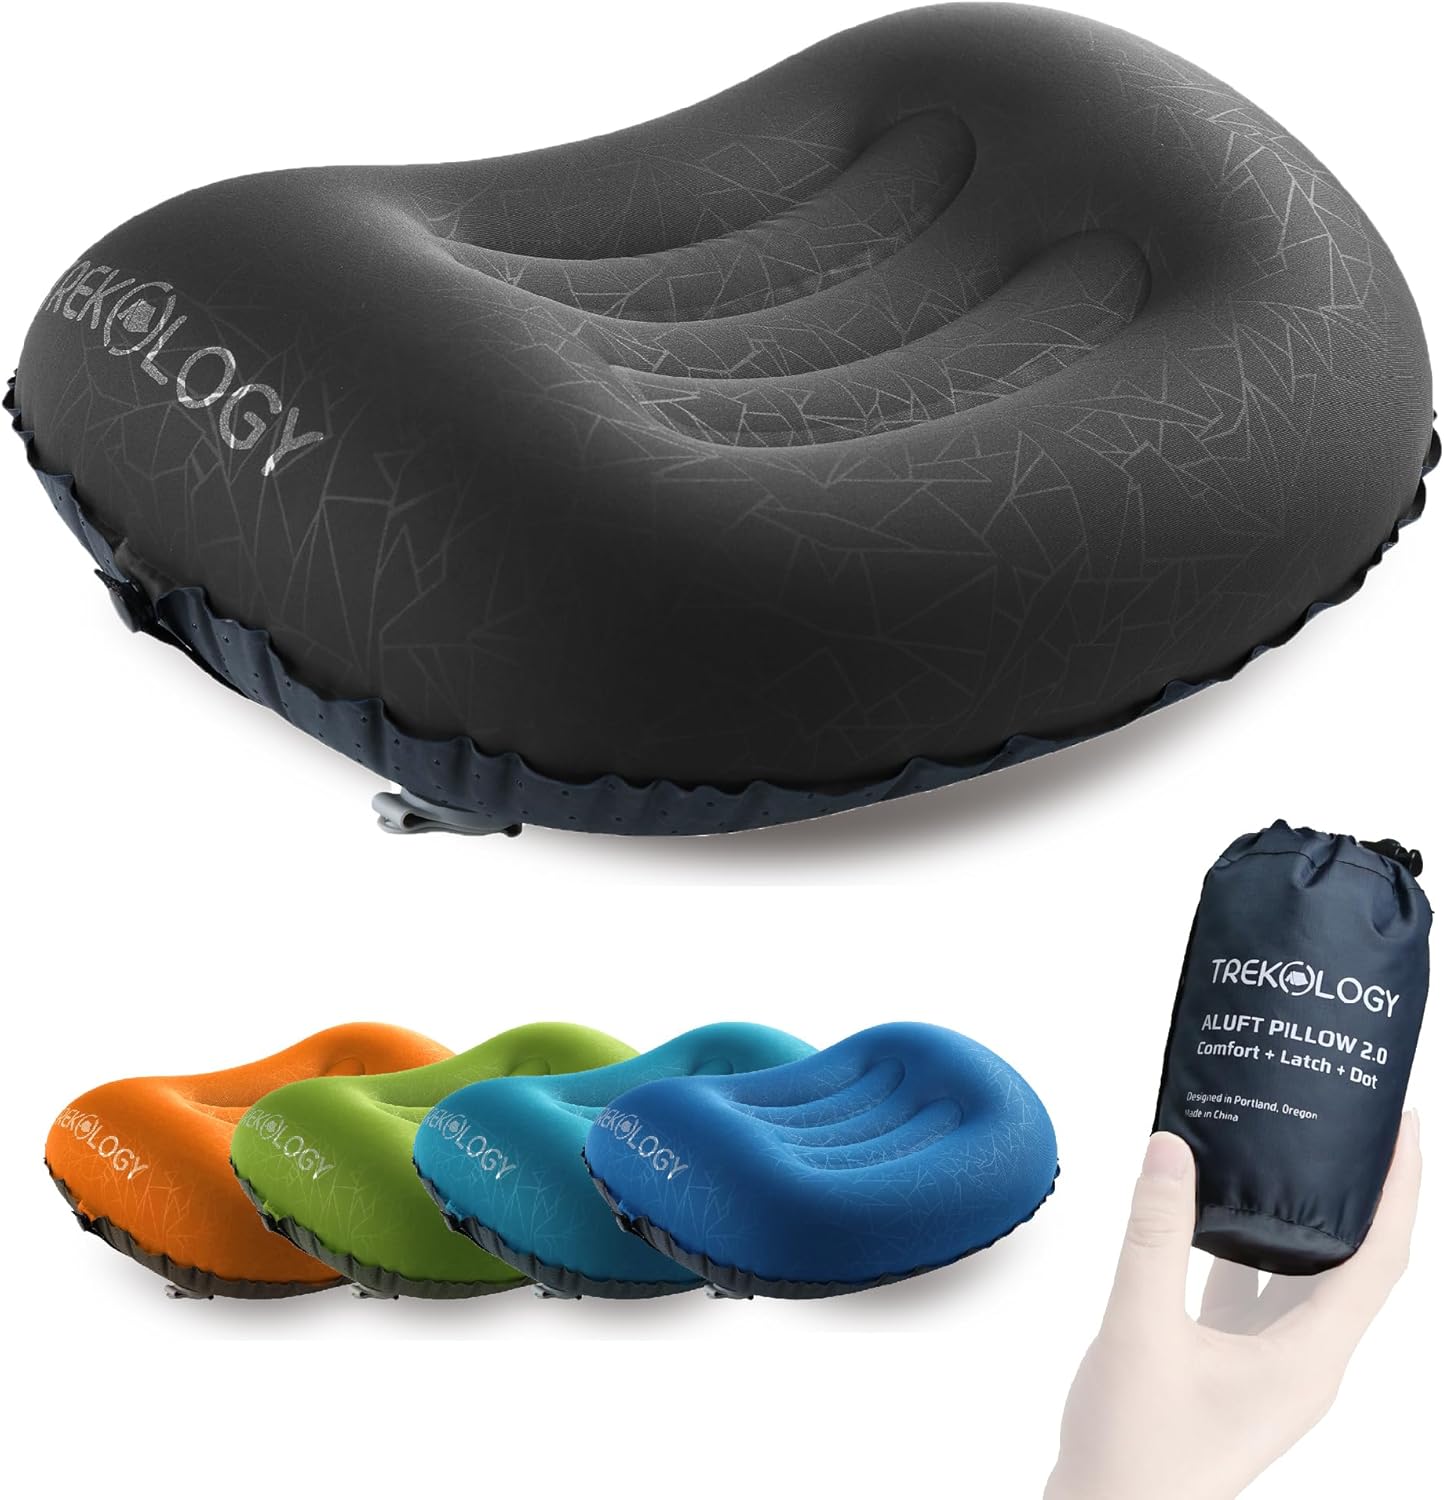
TREKOLOGY ALUFT 2.0 Inflatable Pillow:
4. Trekking Support
Hiking Boots or Shoes
Hiking boots will always be a debating point – some like a classic boot for ankle support and others like a trail shoe for comfort. My balance is really good and I definitely lean towards comfort. There are a ton of options for multiple brands. A few things I looked for in my shoes were: adequate traction on the soles, waterproof, and that they have protection on the toe as you’ll stub your toes a lot on rocks.
I would recommend going into a store like REI to try on all the different shoes and boots. With today’s technology, do rely on the old adage of “they’ll break in” – they won’t. Make sure they are comfortable to start with as you’ll want to put some miles in them before heading out on the trail. I ended up with The North Face Vectiv Fastback and have enjoyed their grip and comfort for many miles.

Available in low and hightop. Highly recommend stepping up at least a half size as they run small.
Trekking Poles
These are a game-changer for backpacking because they make hiking feel easier and more stable, especially when you’re carrying a heavy pack. They give you extra balance on rocky trails, steep climbs, and sketchy descents, and they really help take pressure off your knees – your legs will thank you on the downhill. Once you get used to hiking with them, it’s hard to go back.
There are a lot of cheap options for around $30. But for just $40, I found these carbon fiber ones that are light weight, look good, and have worked great for me. The only thing you may need is to buy additional rubber feet as they do wear out over time and the sound of the ice pick on rock is too harsh for me.

Telescoping trekking poles with carbon fiber extensions and aluminum top pole.
Sun Protection
32 Degrees Cool Hooded Sun Shirt
Why it’s a winner: $60-70 for a shirt that you are going to sweat in, get dirty, and possibly use as a towel here and there is just dumb. 32 Degrees makes some great basics, and I love the sun shirt. Lightweight, stretchy, and super comfortable under my pack. And at just $15, they are hard to beat: https://amzn.to/3Or4L7C
5 Panel Hat
Keep the sun off your face: Once again, $30-40 for a name brand hat is just nuts. I looked for an unstructured hat, that was water resistant, breathable, and could take being stuffed into my pack. This one on Amazon fits all of those requirements, comes in a bunch of solid colors, and has been great: https://amzn.to/4ahcca4
Sunglasses
It’s bright out there: I’m lucky to have a few pairs of Oakleys that have been given to me, but I rarely take them with me on a backpacking trip. That’s because there is always at least one occasion that they fall off your head, you drop them, or they just get caught up in your bag and get scratched. YOu don’t need expensive glasses, but do get a quality built pair with polarized lenses to cut down on glare. Goodr takes a classic design and adds a ton of color options for just $30: https://amzn.to/46HAebX
5. Kitchen
After a long hike, I don’t want to mess with too much to get dinner prepared. And that’s why I like the simplicity of a stove system. Everything in stored in the pot, goes together securely, and cooks quickly.
Fire-Maple “Fixed Star 1” Stove System
Why it’s a winner: If you want the efficiency of a Jetboil without the price tag, this is the answer.
- Efficiency: This is an integrated system, meaning the pot locks onto the stove and uses a heat exchanger. It boils water lightning-fast and saves you fuel weight in the long run.
- Design: The pot is insulated, and everything nests inside itself perfectly.
- The Verdict: Ideal for boiling water for freeze-dried meals and coffee—fast, wind-resistant, and efficient.

If you want the efficiency of a Jetboil without the price tag, this is the answer.
Sawyer Products Mini Water Filtration System
Why it’s a winner: The Sawyer Mini is arguably the most popular water filter in the world, and for good reason.
- Lifespan: It’s rated for up to 100,000 gallons. You will literally never wear this thing out.
- Versatility: You can screw it onto a standard water bottle, use it as an inline filter on your hydration bladder, or drink directly from the source with the straw.
- The Verdict: At roughly $20-25 and weighing only 2 ounces, there is no reason to buy anything else
- https://amzn.to/4a5d4P0
Piscifun Dry Bag
Why it’s a winner: The Sawyer Mini is arguably the most popular water filter in the world, and for good reason.
- Lifespan: It’s rated for up to 100,000 gallons. You will literally never wear this thing out.
- Versatility: You can screw it onto a standard water bottle, use it as an inline filter on your hydration bladder, or drink directly from the source with the straw.
- The Verdict: At roughly $20-25 and weighing only 2 ounces, there is no reason to buy anything else.
- https://amzn.to/4bKCAKK
6. Trail Technology
Garmin InReach Mini 3
The Garmin inReach Mini 3 is the most recent generation of the most popular backpacking GPS device that provides you reliable two-way satellite communication and SOS capability anywhere on the planet, even when you’re far from cell service. It’s incredibly compact and lightweight, so it won’t weigh down your pack, and it offers long battery life for multi-day trips with customizable tracking intervals. You can share your location with loved ones, send basic messages, and trigger an interactive emergency SOS if needed, giving you peace of mind deep in the backcountry.
Satellite Messaging Phone
Newer smartphones now offer satellite messaging features that can cover similar basics: for example, many iPhone models can send Emergency SOS via satellite to contact emergency services when you’re out of cellular or Wi-Fi coverage, and with iOS 18+ and supported hardware you can also send/receive standard text messages via satellite to friends and family when off the grid.
This phone-based satellite messaging is super convenient — it’s built into your everyday device and works without a separate gadget — but it typically has limitations like the need for a clear view of the sky, slower message delivery, geographic restrictions, and shorter battery life compared to a dedicated device like the inReach. Plus, if you drop it, it will break the screen on the rocks.
OnX Backpacking App
The onX Backcountry app is my go-to tool for hiking – both when I’m planning trips and when I’m actually out on the trail. I use it to map out routes ahead of time with detailed topo and satellite layers, check elevation profiles, and mark waypoints for campsites or key junctions. On the trail, it’s what I rely on for real-time GPS tracking and offline maps, especially when I don’t have service. It gives me confidence in my route, helps me stay oriented, and keeps all the important trail info in one place, making it an essential part of every trip I take.
Head Lamp
If you go into an outdoor store, you’ll find that some headlamps run upwards of over $100. ARE YOU KIDDING ME?! I picked up a 2-pack of headlamps from Grocery Outlet one day for $10. They have a beam and flood pattern, is detachable so you can use it as a regular flashlight, a magnet to attach it to things, and is rechargeable via USB C. I’ve had these for a few years now and they have worked flawlessly. Since this was a cheap brand called Farpoint, I can only find similar knockoffs online here: https://amzn.to/471AuTf
FlexSolar 10W Solar Panel
You’ll need to keep everything charged if you’re going out for more than just one night. If it’s going to be sunny, I bring along this small solar panel that can fit into the water reservoir pouch in the backpack. It won’t charge anything quickly, but I pull it out everytime I stop for a break and just plug my battery backup in to keep topped up: https://amzn.to/4aclVgo
Anker Power Supply
I carry a 10,000 mAH battery with me as I use my phone a lot and also have multiple GoPros I bring along with me. This usually can top all of them up over night and then I work on recharging it throughout the day with the solar panel: https://amzn.to/4kr6yW7
Thermacell Backpacker Mosquito Repeller
The outdoors is amazing, but mosquitos are not! I started using Thermacells while camping a couple years ago and they work like magic. Thus, this year I picked up the backpacker version which connects to my fuel canister. This will make sitting around camp so much more enjoyable https://app.rockporch.com/prdlink/I8ASo8DxaT
Final Thoughts
This kit proves that with smart choices, you can build a loadout that is reliable, comfortable, and ready for adventure for not a lot of money. These aren’t the cheapest choices as I did decide to spend a bit more on my key pieces of gear, so you can go cheaper.
Note: This post obviously contains affiliate links. These provide me with a small commission at no cost to you. Thanks for your support!
Leave a Reply